Storefront
This guide will help you set up a Nimara storefront in your local environment.
Fork and clone project
First, fork the Nimara repository to your own GitHub account. This allows you to make changes independently and submit pull requests later.
Go to the Nimara GitHub repo.
Click the Fork button in the top-right corner.
Once the fork is created, clone your fork locally:
git clone https://github.com/{your_github_username}/nimara-ecommerce.git nimara-ecommerce
cd nimara-ecommerce
Install project's dependencies
pnpm install
Copy variables
Copy environment variables from .env.example to .env:
cp .env.example .env
Add backend URL and set up environment variables
Use a free developer account at Saleor Cloud to start quickly with the backend. Alternatively, you can run Saleor locally using Docker.
# Add backend address
NEXT_PUBLIC_SALEOR_API_URL=https://{your_domain}.saleor.cloud/graphql/

# Local example
# NEXT_PUBLIC_SALEOR_API_URL=http://localhost:8000/graphql/
For a full list of required and optional variables, see the Environment Variables Guide.
Set up webhooks in Saleor
See the Webhooks section below.
Run project
Run the development server:
pnpm run dev:storefront
i18n
The storefront uses the shared i18n package and message composition system described in the i18n architecture docs. It passes app: "storefront" to @nimara/i18n's createRequestConfig, so it receives the common + storefront message bundles (with locale-specific overrides applied where defined).
Webhooks
Webhooks in Saleor let you receive real-time notifications for events like product or page updates, allowing you to instantly reflect changes in your frontend. This keeps your Nimara storefront in sync with Saleor, enabling instant cache updates and smooth integration.
How to set up webhooks in Saleor dashboard
Create a new extension for webhooks
Go to your Saleor dashboard → Extensions → click Add Extension → select Provides details manually → add name and assign the necessary permissions for your app: Manage navigation, Manage pages, Manage products → click Save.
Create webhooks
In the Webhooks & Events section click Create Webhook.
You will need to create four webhooks, one for each of the following:
Product Webhook
- Target URL:
https://<your-domain-url>/api/webhooks/saleor/products - Events: select all events related to the
Productobject, exceptExport completed.
Menu Webhook
- Target URL:
https://<your-domain-url>/api/webhooks/saleor/menu - Events: select all events related to the
Menuobject.
Page Webhook
- Target URL:
https://<your-domain-url>/api/webhooks/saleor/page - Events: select all events related to the
Pageobject.
Collection Webhook
- Target URL:
https://<your-domain-url>/api/webhooks/saleor/collections - Events: select
DeletedandUpdatedevents related toCollectionobject.
Deployment
Connect GitHub Repository
Go to your projects on Vercel → click Add New and select Project.
Choose your Nimara GitHub repository and click Import.
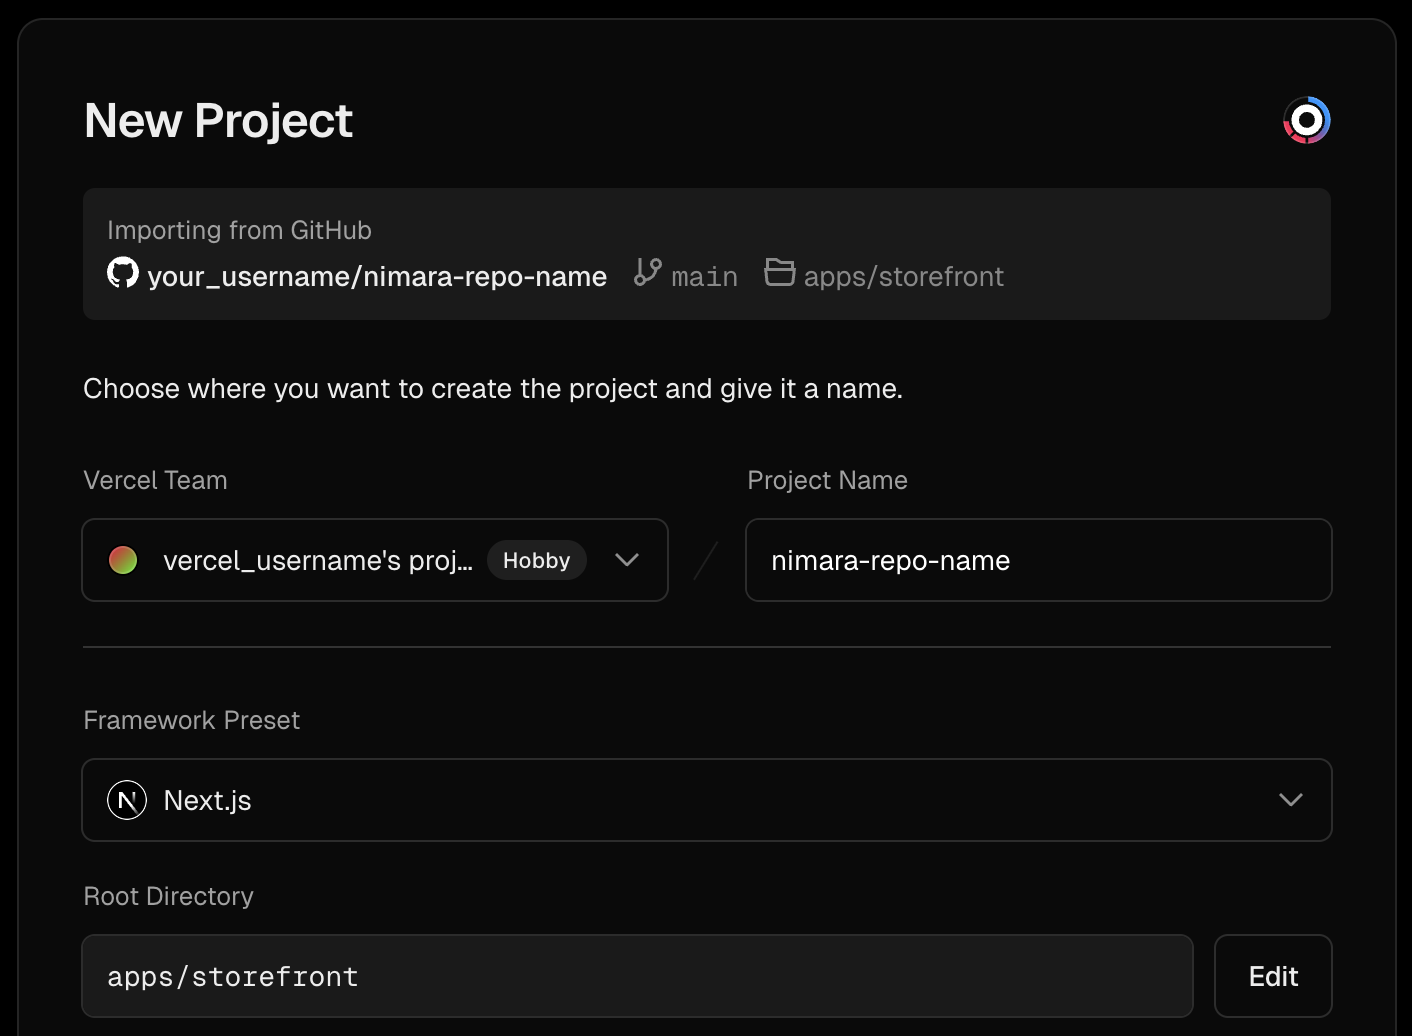
Set up New Project
Select your Vercel Team, add Project Name, set Root Directory to apps/storefront:
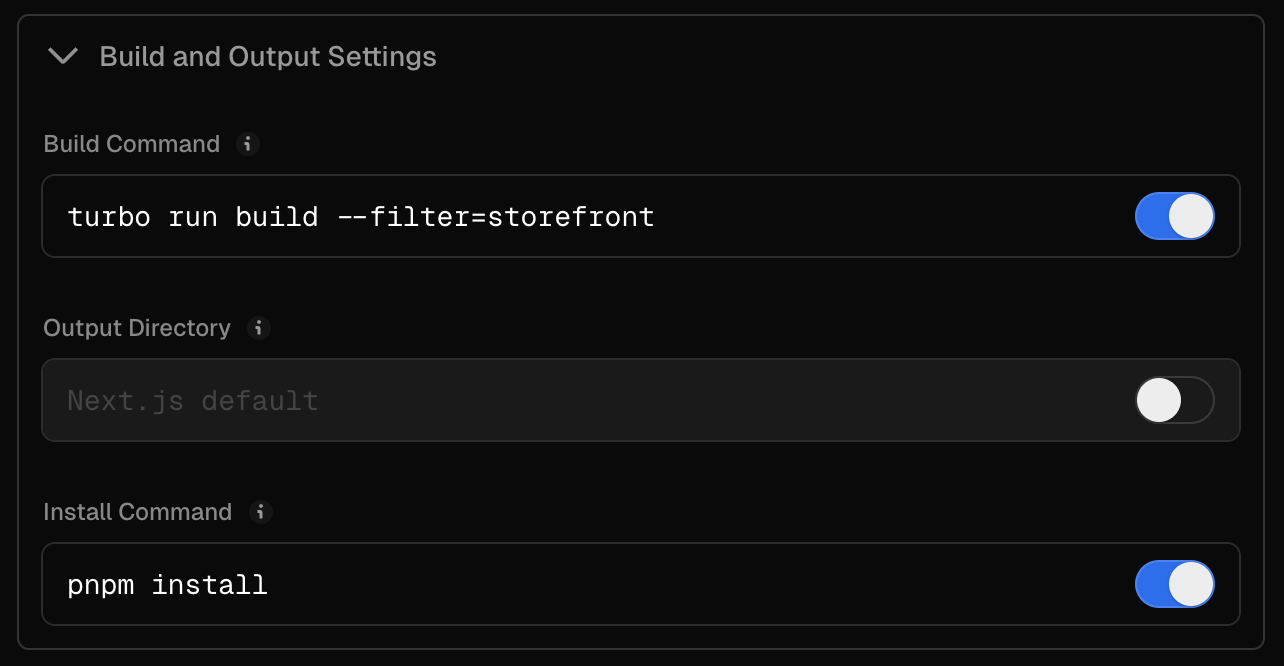
Set Build Command to turbo run build --filter=storefront and Install Command to pnpm install:
Vercel does not use your local .env file so you must define all required variables:
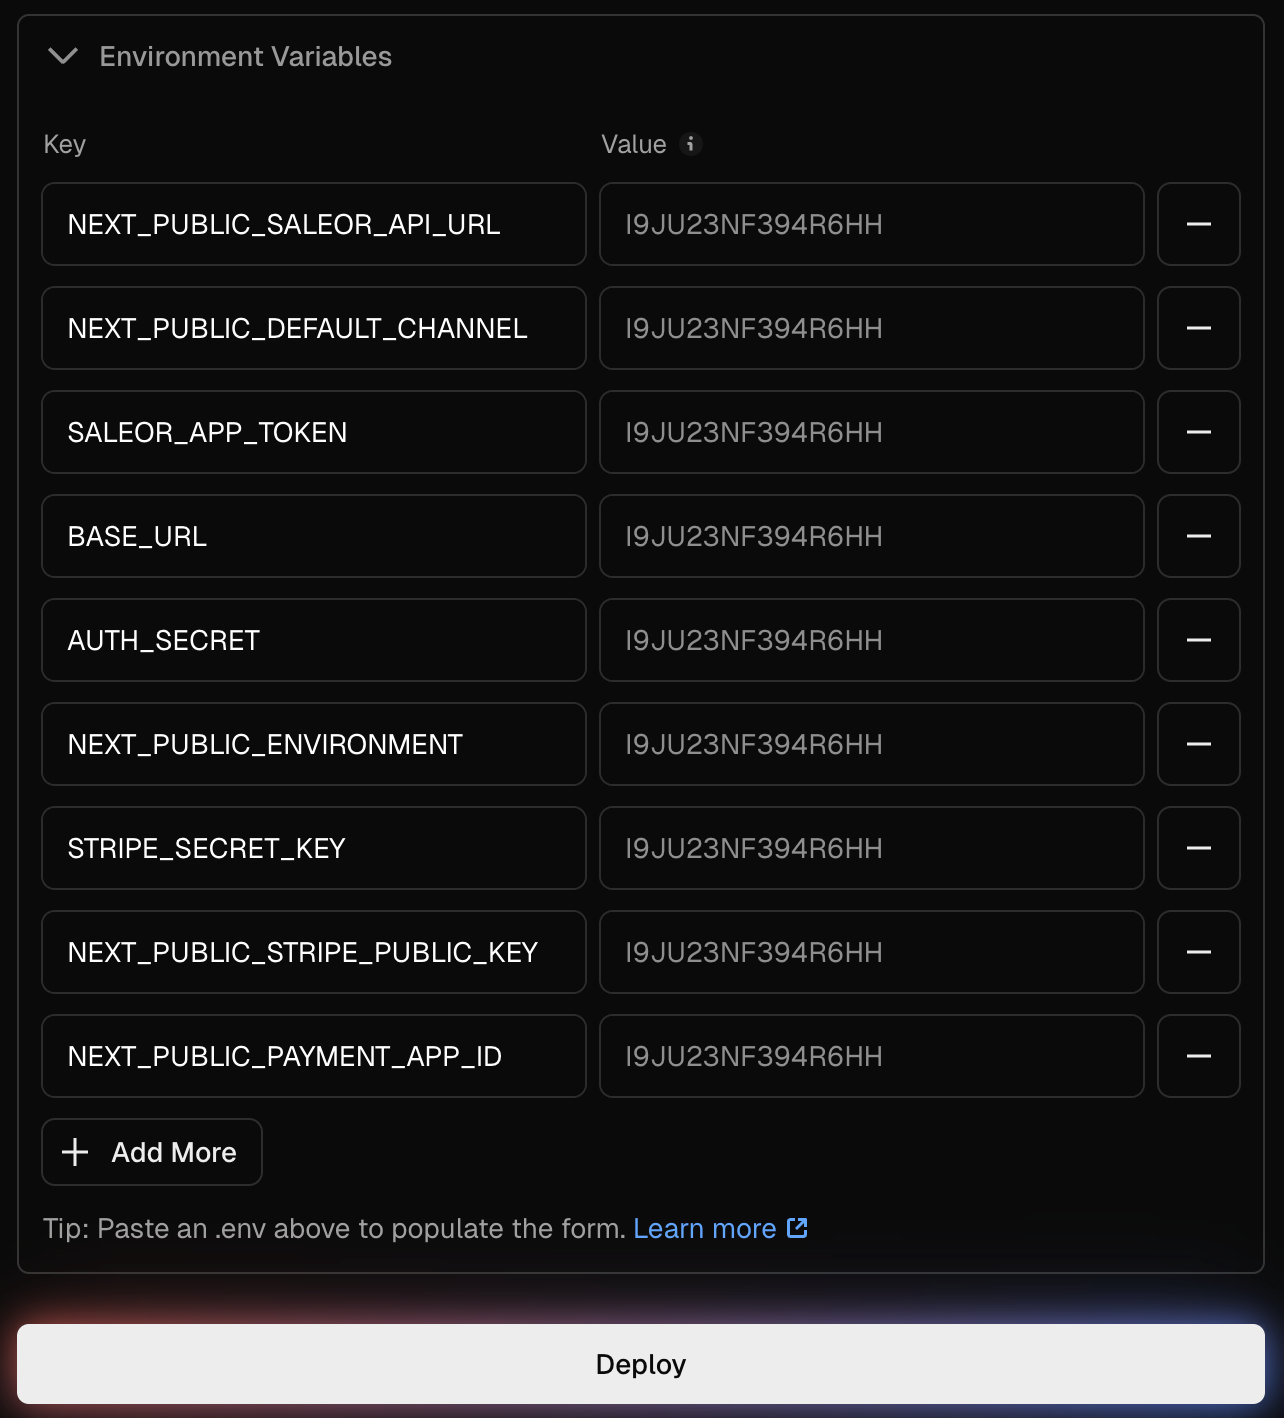
Note: See the Environment Variables section for detailed instructions on setting up these variables.
Deploy
Click Deploy to deploy your project.
Verify Deployment & Configure Settings
After successful deployment, click Continue to Dashboard to manage your deployed Nimara project.
Node.js version 22 or higher is required. Set the Node.js version in your Vercel project settings.
From the Vercel dashboard, you can manage and customize your storefront project:
- Monitor deployments – view the status of each deployment (production & previews)
- Set environment variables – add or update secrets without redeploying locally
- Configure custom domains – add or change production and staging domains
- Trigger redeployments – manually redeploy if you update envs
- Inspect logs – view build and runtime logs for debugging
- Manage team access – invite developers with role-based permissions
- Enable password protection – secure preview deployments from public access
- Enable analytics – track performance and traffic with Vercel Analytics